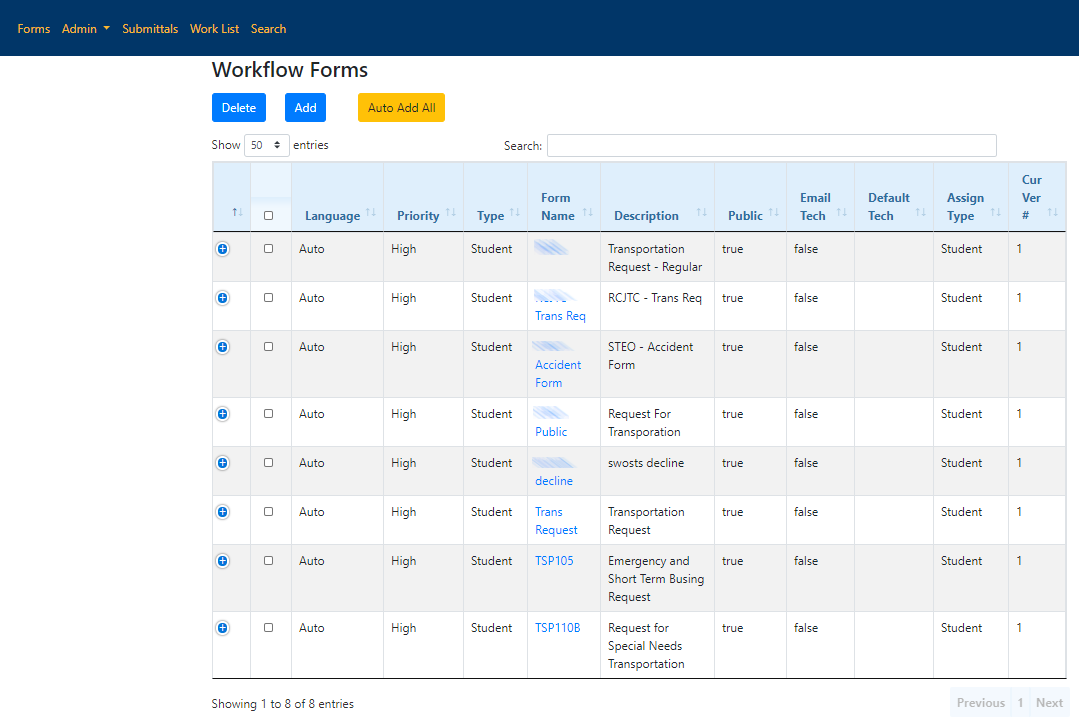
When a new form is added to your Workflow you can make the change to the new form first by clicking on an existing form name. If this is an entirely new form click the Add button at the top to create a new form. For adding custom forms, check out Generic Workflow Forms: Forms and Models
 Basic Tab
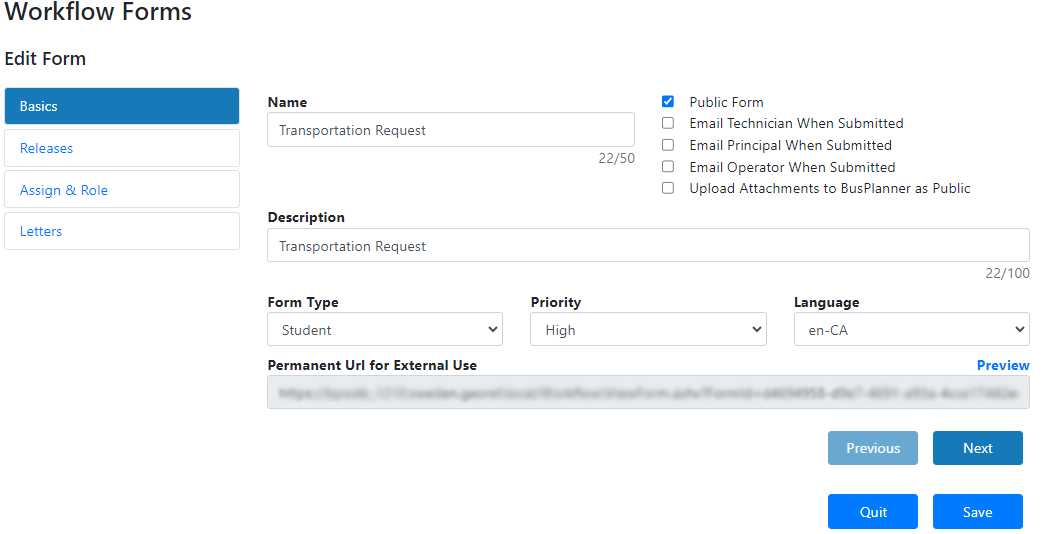
If you are creating an entirely new form, you will need to start with the Basics tab. Otherwise go to the Releases tab. In the Basics tab, fill in the information then click Next. In the 3 checkboxes, check the ones that apply to the form.
Name: Name of the form. Description: The public description of the form. Form Type: The nature of the information contained within the form. Can be set to Student or Operator. Priority: In the future, this will affect how submittals are ordered in the Submittals and Work List sections. Not used at this time. Language: The language in which the form is written. Permanent Url for External Use: The web link that parents can use to access this form. Options•Public Form: When this is checked, the form will be visible to the public on BusPlanner Web. •Email Technician When Submitted: This will email the first technician on the list (by alphabetical order). •Email Principal When Submitted •Email Operator When Submitted: This will email the first Operator with the corresponding school assigned. If there is more than one Operator, it will also be based on the list by alphabetical order. •Upload attachments to BusPlanner as Public: This will ensure all PDFs uploaded as attachments to students will be marked as public. |
Releases Tab
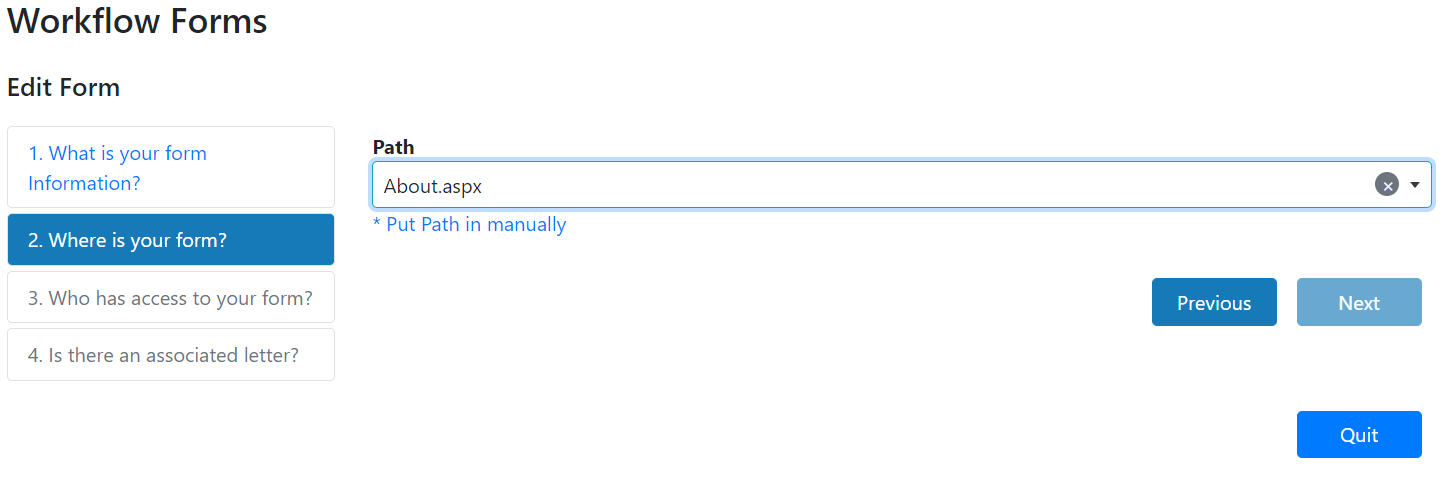
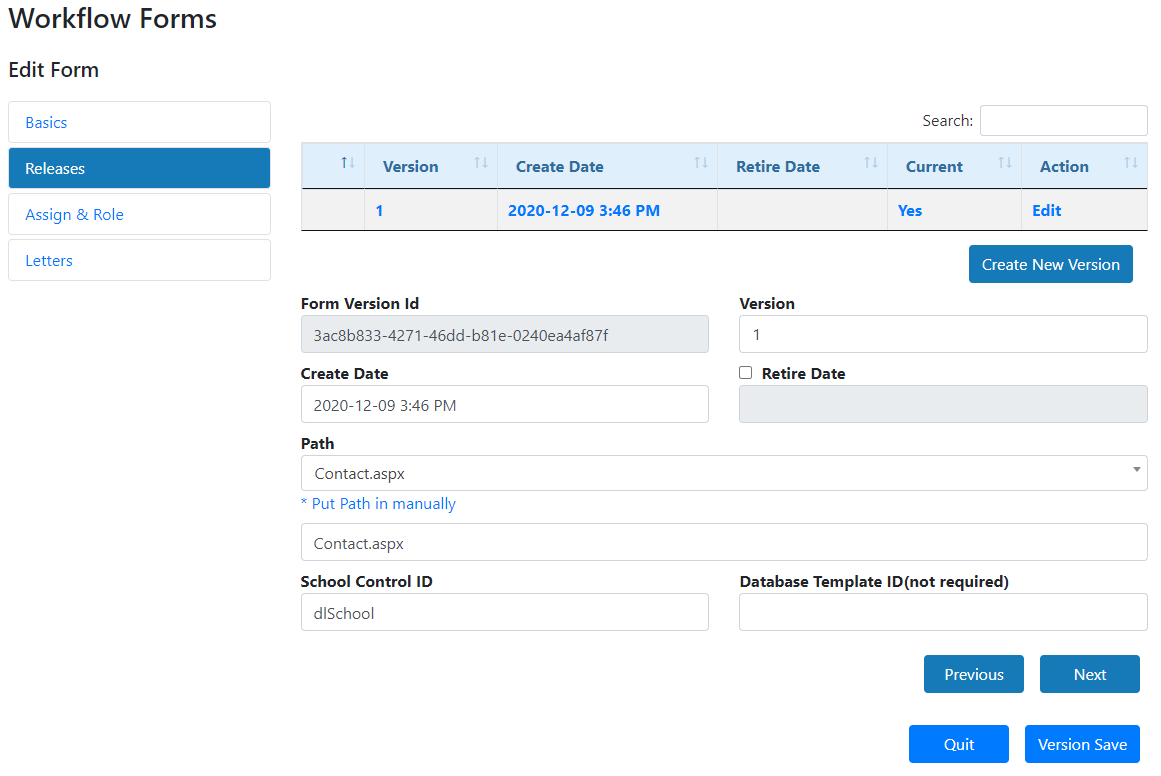
In the release tab, this is where you can edit or add in the newly created form. For New Forms: 1. Click on the drop down under path. 2. Locate and Select the form. 3. Click next.
For existing forms: 1. Click on Edit. 2. Click on the drop down for path. 3. Locate and select the new form in the drop down. 4. Click save.
Note: Database Template ID is usually left blank. This only exists if there is a template set up for your Workflow form to update to your BusPlanner Pro database. Please contact BusPlanner Support if you have any questions about this. |
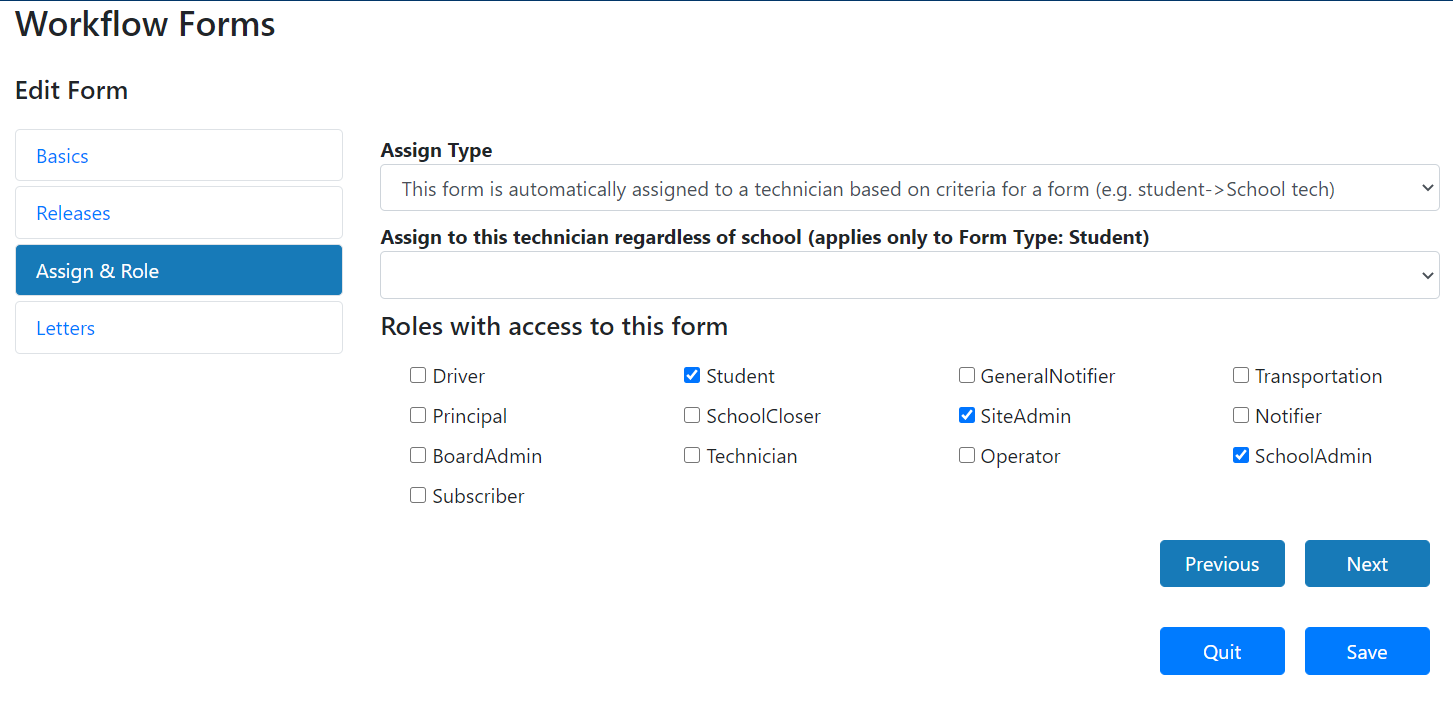
Assign & Role
In the Assign & Role tab, you can assign who has access to this form. You can also have this form automatically assigned to one person. For newly added forms click Create to create the new form. If you are editing an existing form click Next or Save.
Assign Type: How the form is auto-assigned when submitted •This form is assigned to Board Administrators •This form is assigned to operators •This form is assigned to principals •This form is assigned to SchoolAdmin exclusively •This form is assigned to school users regardless of role •This form is automatically assigned to a technician based on criteria for a form (e.g. student -> School tech) •This form is assigned to a selected technician at the time of being filled out •This form is not assigned to any particular person and is viewable to anyone logged in Assign to this technician regardless of school (applies only to Form Type: Student): This will assign the form to a chosen technician regardless of school. Roles with access to this form: Check the roles(s)/users that apply to this form. |
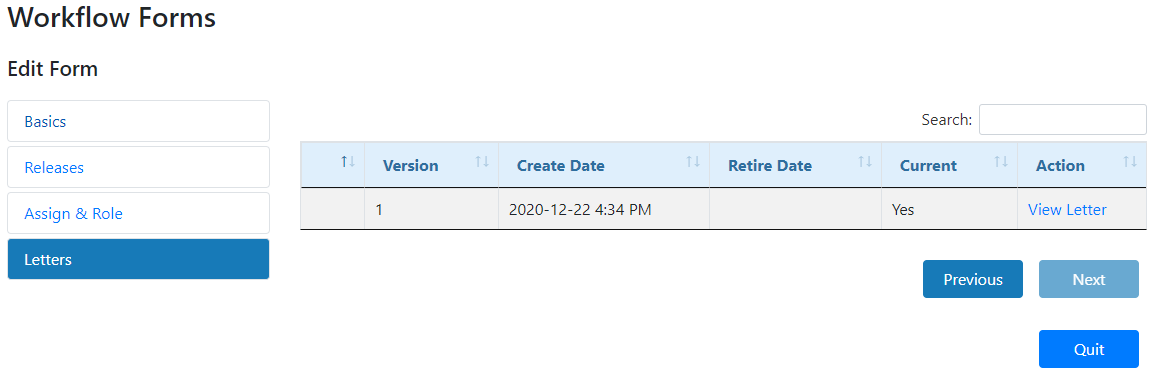
Letters
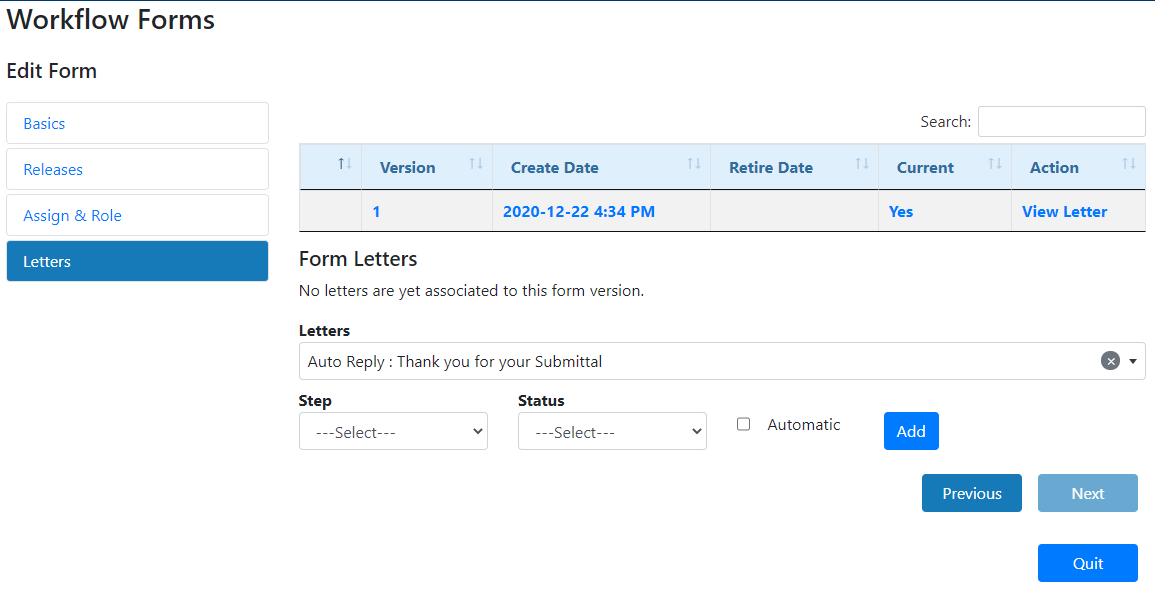
In the letters tab, you can choose which letter would apply to this form. For new forms, this tab can only be accessible after you created the form.
If you have any custom letters you would like applied click on view letter. 1. In the Letters drop down, locate and select the letter 2. Choose the appropriate Steps and Status. See Admins Letters for more information. 3. Click add.
|